Installing a New Corner Ring on a Jib
Text and Photographs by Paul Clayton
 |
Shallow Albemarle Sound has a reputation for developing a rough chop in bad weather, and bad weather is none too infrequent in northeastern North Carolina. On a hot day, air over the land warms and rises, sucking in cool, moist ocean air below it. This leads to atmospheric instability. Low pressure systems roll eastward across the country, and when they hit the coastal region, violent storms can occur. On a recent trip from Manteo to Edenton, we ran into a fast-developing storm that produced a wicked chop and high winds. The combination knocked my Alberg 35 Terry Ann onto her beam ends, breaking a spreader and ripping the d-ring out of the jib clew.
I bought a Sailrite machine last fall to sew the sacrificial cloth on the jib when I did a roller-furling conversion. Some sailwork can be done with a homemaker's Singer or Brother, but it will wear one out quickly, and don't even suggest borrowing an accomplished seamstress's Bernina. Depression-era Singers still command a premium price among canvas workers because their geared drives can hold up to the demands, and I have done a lot of stitching with my Singer 15-91. But the old Singers can't zig-zag, and that's something necessary for sailwork.
The Sailrite machines are the first choice for portable machines that will zig-zag and hold up to heavy canvas and sail work. Anything else and you are talking about big industrial machines with external belted motors that have to be installed in a shop setting. I have seen positive reviews of the Reliable Barracuda machines, and some people get good service out of their Jukis, but for a couple hundred dollars more you can get a Sailrite. Their reputation is that they are the best, and that's the consensus among the sewing sailors that I know. One thing that is a tip-off is that they are impossible to buy used. Sometimes it seems the things pass down through inheritance. More likely, Sailrite users have friends who want to buy their machines, so they never show up on Ebay. A few retailers used to sell Sailrite machines at their own sites and at Amazon, but they have all been sold out for the last year. The only way to buy a Sailrite is to go to the Sailrite website and order one at full list. Expect to wait one to two weeks for shipping - down from six weeks last summer.
 |
I knew I had the equipment to replace the corner ring on my jib, so it made sense to do the job myself. When it comes to any kind of sailwork, the first thing to do is to see if Sailrite has an instructional video. Their video How to Reinstall a Sail's Corner Ring told me everything I needed to know about the project. I decided this was something I could do, so I ordered a d-ring from Sailrite (the other supplies I already had).
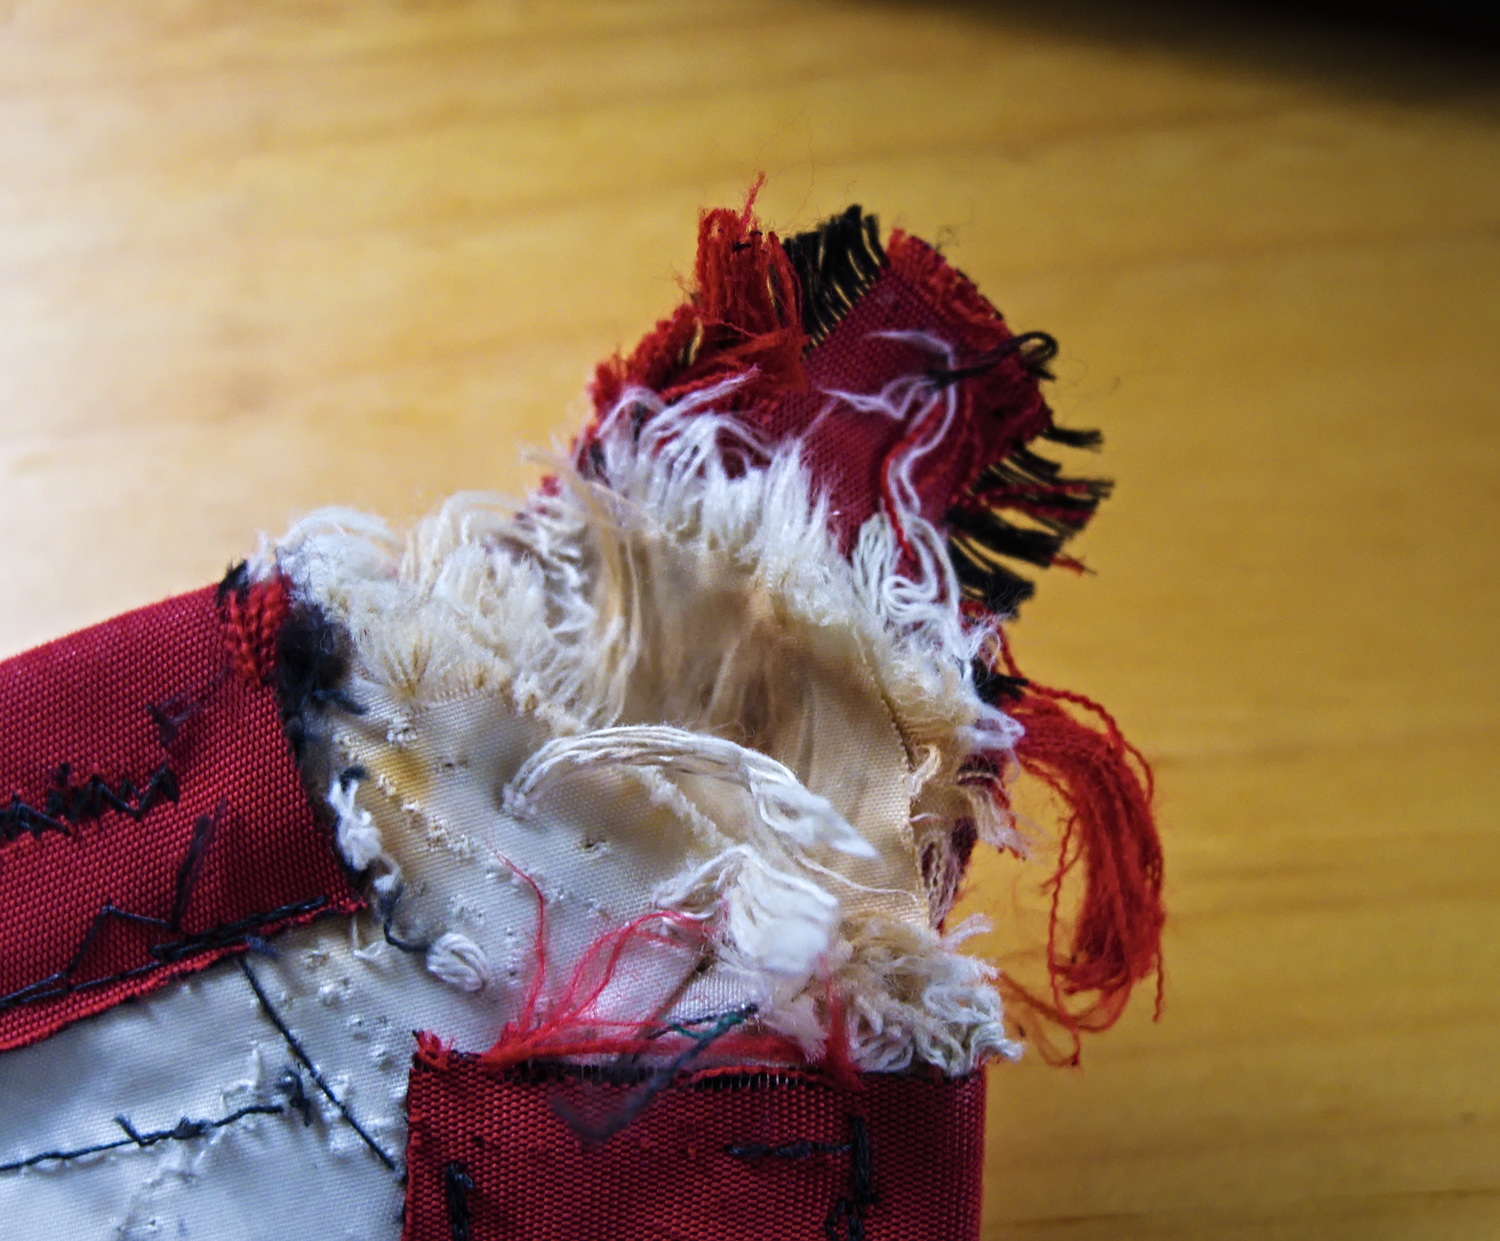
While I waited for the d-ring, I took some steps to get ready to sew. First I cut out the stitches securing the sacrificial cloth in the area of the clew, so I could turn it back and out of the way of the webbing that would attach the d-ring. V-92 sail thread is not something that can be ripped out of fabric. Every stitch has to be cut. So just getting the sacrificial cloth out of the way was an hour-long job. Then I set to work cutting out the damage. I was relieved to find that the sail itself was completely intact. The damage was to the original webbing, the hand stitching finishing the sail - d-ring attachment, and the sacrificial cloth in the clew area.
Replacing the d-ring turned out to be a time-consuming but not difficult task. My Sailrite order came in a few days, and with d-ring in hand I was ready to work. In my box of supplies I found some good one-inch wide webbing that would form the two twenty-inch straps that would pass through the ring and be sewn to the sail. I used to cut webbing with scissors and then melt the ends with a lighter, but lately I have found a better method. Now I wrap one layer of masking tape where the cut should be, and then cut with a hot knife. It makes for a straighter, cleaner cut with less lumps of melted strapping on the ends.
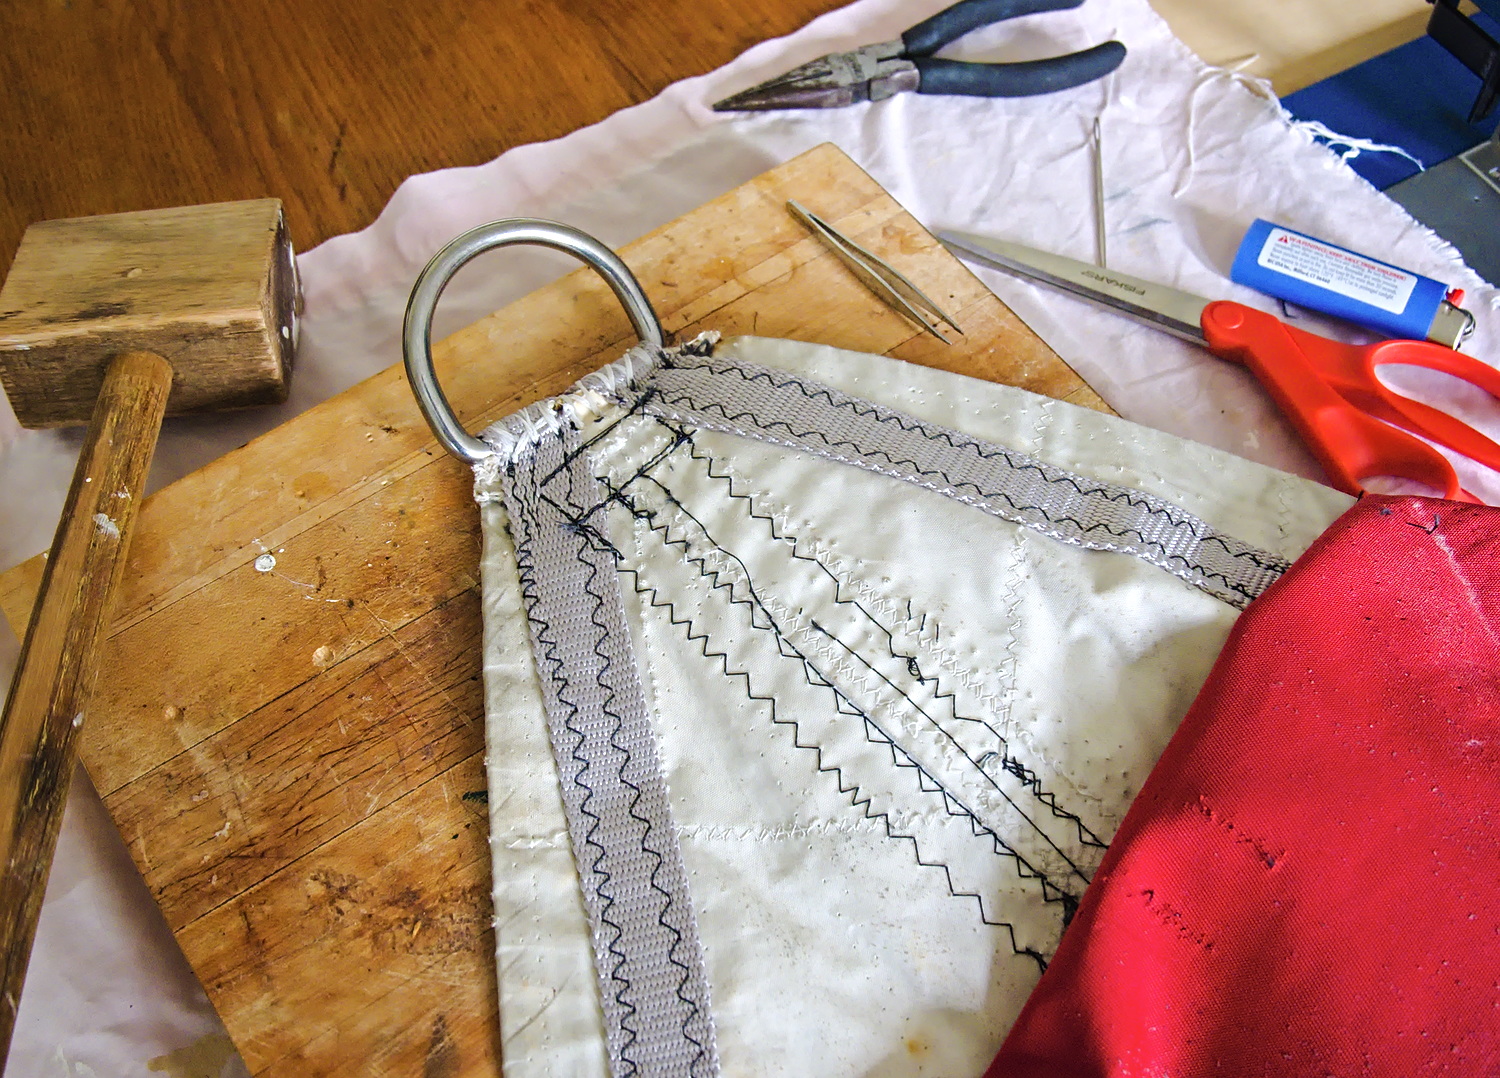 |
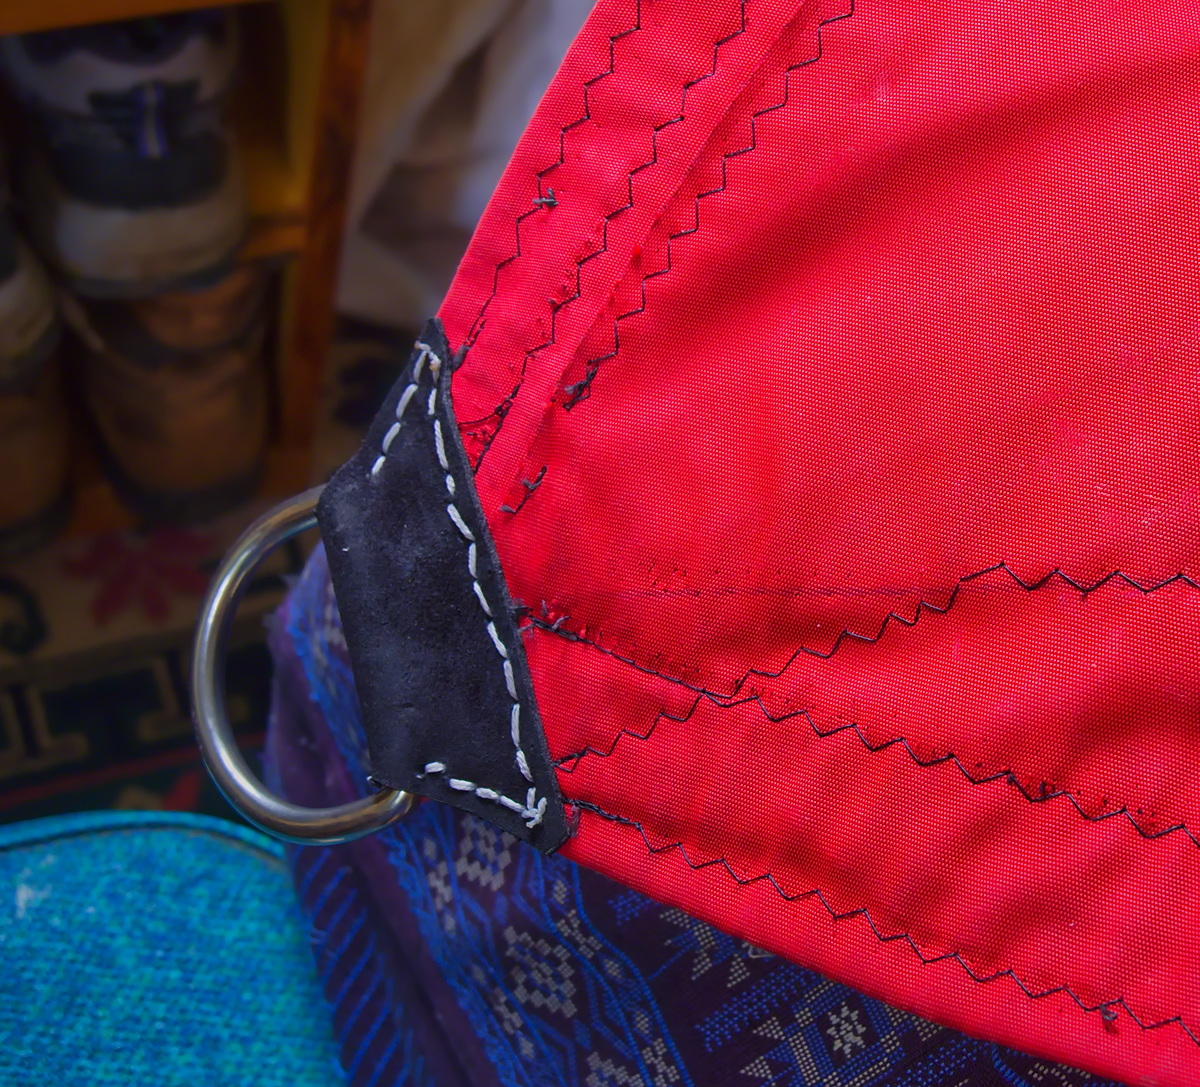
Once the two webbing straps that hold the d-ring in place were sewed in, it was time to do some hand stitching. I punched a row of holes along the d-ring bar with an awl and then used doubled heavy whipping twine to frap the bar onto the edge of the sail. With that done, I was able to turn down the sacrificial cloth and stitch it back in place. To protect the stitching from chafe I finished off with a leather butterfly patch over the d-ring bar.
As powerful as it is, there are some things the Sailrite balks at. If it starts to bog down, when you are, for example, sewing through eight layers of heavy sailcloth, it is time to switch from zig-zag to straight stitch. Otherwise, the needle will deflect and hit the cap spring or the gib hook, leaving a burr. The burr will then abraid the thread, which won't feed right, and the stitch will get ugly. It happens, and then you have to remove the parts and clean up the burr with emery paper or a fine jeweler's file. It's not too difficult, and Sailrite has a video on how to do it. How do I know all this? I've done it a couple of times. The first time fixing it was intimidating and difficult, the second time it was a piece of cake.
Some jobs are just too big for even a straight stitch, or something gets in the way of the presser foot, and then you have to break out the awl, punch holes, and hand-stitch with heavy whipping twine. That's the way it was done on the old sailing ships. Most of them had a dedicated crew member who didn't stand watches, but spent all day maintaining the sails.
Other than cleaning up burrs from needle strikes, the Sailrite requires very little maintenance - just periodic cleaning and oiling. Even so, these machines demand a level of attention far beyond a modern Brother or Singer, because of the heavy, demanding work they have to do. In addition to punching through thick sailcloth, they use enormous quantities of thread. I used about 20 bobbins of thread to stitch the sacrificial cloth.
 |
It took me a good five hours to do this repair, and a sail loft probably could have done it in one, and made a much nicer and cleaner job of it. But I enjoyed myself, learned a lot, and saved $100 or so. It may not be pretty, but it is solid, and as long as I keep an eye out for line squalls, I expect it will last.
Another big job that I am currently working on is making a sailcover for Terry Ann's mainsail. After that is done I have promised a friend I will alter some heavy outdoor curtains for her gazebo. As expensive as the Sailrite machine was, it has already come close to paying for itself.
Text and Photographs by Paul Clayton. Posted 06/13/21.
Copyright © 2021 Paul M. Clayton